
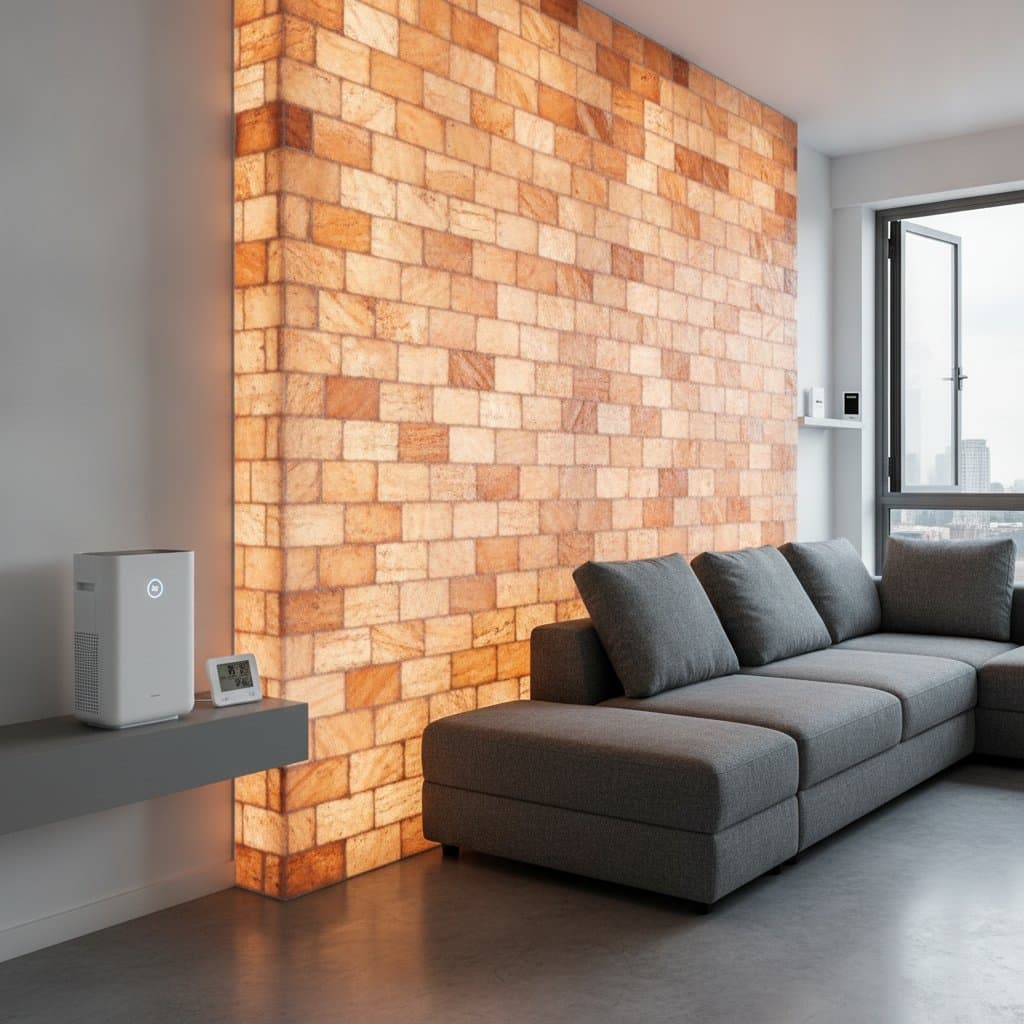
Salt Walls and Indoor Air Quality
A salt wall can bring warmth and visual interest to a room. It should never replace proven ventilation, filtration, or moisture control.
Salt walls often appear in marketing as natural air purifiers. Claims about negative ions and health benefits lack strong scientific support. This guide explains how salt walls function, where they belong in a healthy home, and how to use them safely.
A salt wall is not a treatment for asthma, allergies, infections, or other medical conditions.
How Salt Walls Work
Salt walls consist of blocks, bricks, or panels made from rock salt. These materials often receive backlighting to create a warm glow. Proponents suggest the salt releases negative ions or captures airborne particles.
A salt surface may trap some dust when damp, but this does not equal reliable air cleaning. The wall cannot remove carbon monoxide, mold spores throughout a room, volatile chemicals, or fine particles as efficiently as a certified air cleaner.
Treat a salt wall as a decorative material with possible comfort benefits, not as a purifier.
Materials and Construction
Most salt wall materials come from underground salt deposits. The blocks contain sodium chloride and trace minerals that create their pink, amber, or orange coloring. Builders may install them as a partial wall, room divider, fireplace surround, or backlit feature.
The blocks are usually porous. They can absorb moisture from humid air, then become wet or develop a powdery surface called salt bloom. Salt bloom is a visible deposit of salt crystals. It can stain nearby wood, metal, paint, or flooring.
A salt wall also adds considerable weight. A structural engineer or qualified installer may need to confirm that the floor and wall can support it. This matters most in upper rooms, older buildings, and large installations.
Understanding Negative Ions
An ion is an atom or molecule with an electrical charge. Negative ions have gained an electron. They occur naturally near waterfalls, during storms, and around some electrical devices.
Some salt wall sellers claim that heated salt releases negative ions that clean indoor air or improve health. The wall may produce little or no meaningful ion concentration under normal home conditions. Even when negative ions are present, research does not establish that a salt wall can reduce indoor pollutants at a useful level.
Indoor air quality experts emphasize that source control, ventilation, and filtration are the practical tools for improving indoor air. This guidance aligns with the broader consensus from public health agencies.
Negative ion generators also deserve caution. Some devices produce ozone as a byproduct. Ozone can irritate the lungs and worsen breathing problems. A decorative salt wall does not provide a reason to add an ionizer to the room.
Tools and Materials for Installation
For a safe installation and basic care, gather these items:
- A level and stud finder
- A moisture meter, especially in humid rooms
- A dry microfiber cloth or soft brush
- A low wattage, heat rated light fixture
- A certified portable air cleaner with a HEPA filter, when filtration is needed
- A hygrometer to measure indoor humidity
- A sturdy base or approved mounting hardware
- A tray or protective mat for loose salt and dust
Do not use water, vinegar, bleach, or household sprays on salt blocks. These materials can dissolve or stain the surface.
Step-by-Step Installation Guide
Choose the Right Room
Pick a dry, well ventilated room. A living area, entryway, or meditation space usually works better than a bathroom, basement, laundry room, or kitchen. Steam, splashes, and high humidity can damage the wall and nearby finishes.
Keep the wall away from sinks, showers, humidifiers, open windows during wet weather, and exterior walls with known dampness.
Check the Wall and Floor
Inspect for leaks, condensation, soft drywall, peeling paint, or musty odors. Repair moisture problems before installation. Salt can hide stains for a short period, but it cannot solve a leak.
Confirm the weight of the blocks, frame, lighting, and base. Follow the mounting instructions for the specific system. A large wall should not depend on ordinary drywall anchors alone.
Plan Safe Lighting
Use a fixture rated for the enclosure and location. LED lighting usually creates less heat than incandescent lighting and can reduce stress on the salt.
Keep cords away from damp areas. Do not place lights where salt dust can collect on hot components. Hire an electrician if the installation requires new wiring, recessed fixtures, or changes inside a wall.
Protect Nearby Finishes
Place a sealed base, stone threshold, or washable protective mat beneath the wall. Leave a small service gap behind the installation if the design allows it. This helps you inspect for moisture and clean the surrounding surface.
Do not install raw salt directly against unsealed hardwood, untreated metal, or absorbent fabric. Salt residue can draw moisture and create stains.
Control Indoor Humidity
Keep indoor relative humidity near 30 to 50 percent when practical. A hygrometer gives you a clearer picture than how the room feels. Use exhaust fans during cooking and bathing. Run a dehumidifier when the room stays damp.
If the salt becomes wet, turns shiny, or sheds crystals, switch off the lights and identify the moisture source. Let the wall dry naturally. Do not use a heater or hair dryer close to the blocks.
Clean Without Dissolving the Salt
Turn off and unplug the lighting before cleaning. Remove loose dust with a dry microfiber cloth or soft brush. Use gentle strokes from the top down.
Never soak the wall. Do not spray cleaner onto the blocks. If a mark will not lift with dry cleaning, ask the installer about the material and finish before using any liquid.
Pair the Wall with Proven Air Care
Use ventilation to remove cooking fumes, cleaning vapors, and excess moisture. A portable HEPA cleaner can reduce airborne particles when sized for the room. HEPA means a high efficiency particle filter designed to capture very small particles.
Replace HVAC filters according to the equipment instructions and household conditions. Source control still comes first. Fix leaks, prevent smoke indoors, and keep dust from accumulating.
Watch for Changes
Inspect the wall, base, nearby floor, and electrical parts regularly. Look for dampness, salt deposits, corrosion, cracking, loose blocks, flickering lights, or unusual heat.
Stop using the installation if water reaches the lighting, the structure shifts, or the wall develops large cracks.
Dos and Don'ts
Do
- Measure humidity in the room, especially after cooking or bathing.
- Use dry cleaning methods on the salt.
- Install the wall on a stable base with appropriate support.
- Keep smoke, candles, and aerosol sprays away from the surface.
- Use a certified air cleaner when allergy or particle control matters.
Don't
- Claim that a salt wall purifies the whole room.
- Use it to replace smoke alarms, carbon monoxide alarms, or ventilation.
- Add an ozone producing ionizer to create a stronger effect.
- Put salt blocks in direct contact with wet masonry or unsealed wood.
- Leave electrical parts exposed to salt dust or moisture.
Health Claims and Salt Therapy
Salt therapy, also called halotherapy, involves breathing air in a salt room or salt cave. Some facilities use dry salt aerosol, which means very small salt particles are dispersed into the air. A solid salt wall does not create the same conditions.
People sometimes report easier breathing or a calmer mood in salt rooms. Those experiences may relate to quiet surroundings, controlled breathing, relaxation, or expectation. The evidence for treating respiratory disease remains limited and mixed.
Do not stop prescribed medicine or delay medical care after installing a salt wall. Children, older adults, and people with asthma or chronic lung disease should ask a qualified clinician before trying salt based treatments.
When to Call a Professional
Call a licensed electrician for new wiring, exposed electrical parts, repeated light failures, or signs of heat damage. Call a building professional for active leaks, damp drywall, structural movement, unsealed hardwood damage, or a large wall with uncertain support. Ask the installer for advice when blocks crumble, hardware loosens, or the warranty requires approved cleaning and repairs.
Cost and Time Considerations
Salt wall installations vary widely in price depending on size, materials, and complexity. Basic panels may cost several hundred dollars, while custom installations can reach several thousand. Professional installation adds to the total cost but ensures proper structural support and electrical safety.
Maintenance requires regular attention. Plan to check humidity levels weekly during humid seasons. Dust the wall monthly with dry cloths. Inspect mounting hardware and electrical components quarterly. Budget for potential repairs if moisture damage occurs.
Maintenance Checklist
Use this checklist to keep your salt wall in good condition:
- Check humidity every few weeks in damp seasons or problem rooms.
- Dust the wall with a dry cloth every few weeks or when residue appears.
- Inspect the base, floor, wiring, and mounting hardware several times each year.
- Clean nearby ventilation grilles and replace HVAC filters as directed.
- Repeat moisture checks after storms, plumbing work, or visible condensation.
- Stop and investigate if you see wet salt, corrosion, odor, cracks, or loose blocks.
Making Salt Walls Work for Your Space
Salt walls serve best as decorative elements that complement, rather than replace, proper air quality management. Focus on ventilation, filtration, and moisture control as your primary tools for healthy indoor air. Use the salt wall to enhance the atmosphere while maintaining realistic expectations about its capabilities.