Switchable Glass as a Dust-Free Curtain Alternative
Switchable glass allows users to adjust privacy and light levels instantly through a simple electrical switch. This technology eliminates the need for fabric curtains that collect dust and obstruct views.
Curtains often trap particles and degrade under sunlight exposure. Switchable glass maintains clear sightlines when desired while providing on-demand opacity.
The following sections explain the operating principles, safe installation procedures, and ongoing care requirements for this material.
Core Operating Principles
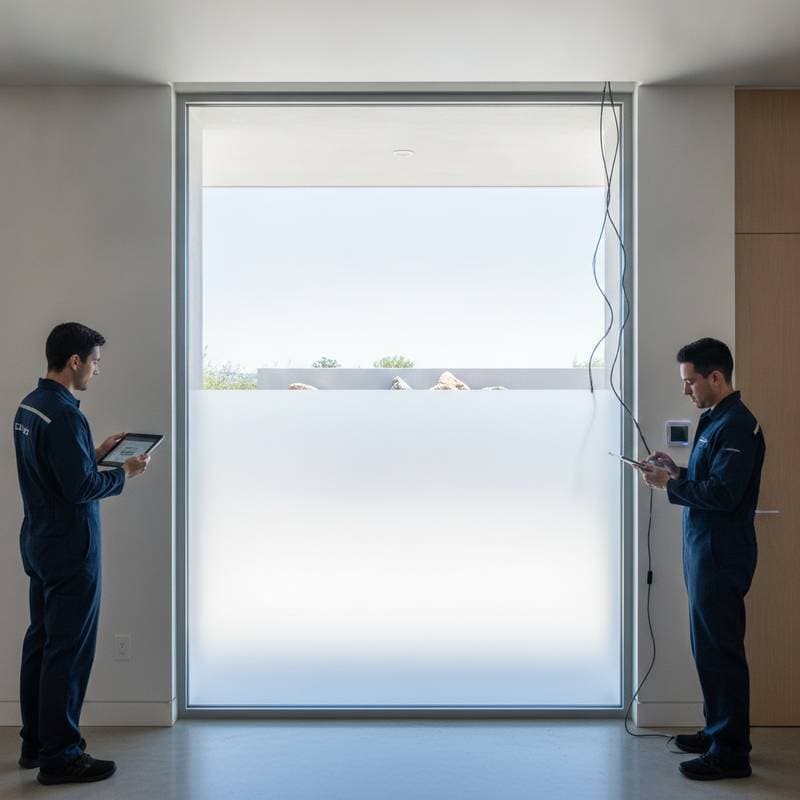
Switchable glass, also known as electrochromic glass, alters its tint when low-voltage current passes through embedded layers. The surface transitions between transparent and frosted states without moving parts.
Panels operate on standard low-voltage supplies and fit within conventional window frames. Proper installation requires adherence to electrical codes, and units should not be placed in areas prone to persistent condensation such as poorly ventilated bathrooms.
Required Tools and Materials
- Measuring tape
- Soft cloth and mild glass cleaner
- Electrical tester
- Power supply or switch control panel
- Silicone sealant rated for glass
- Optional smart home hub for remote operation
Installation Sequence
1. Measure window openings
Record exact width and height dimensions. Precise measurements ensure custom panels fit without gaps that could stress wiring connections.
2. Select glass type
Choose between complete electrochromic panels or retrofit films applied to existing glass. Full panels deliver a seamless appearance at higher cost.
3. Prepare the frame
Clean all surfaces and inspect for moisture or structural damage. Seal gaps to prevent water entry and electrical faults.
4. Position the panel
Place the unit with wiring leads oriented toward the control location. Handle only the edges while wearing gloves to avoid surface marks.
5. Connect power leads
Attach wiring to the switch or hub following manufacturer specifications. Test voltage levels with an electrical tester before activation.
6. Verify switching function
Apply power and confirm the glass changes state within expected time. Slow response indicates possible wiring issues or mismatched power supply.
7. Seal edges
Apply silicone sealant around the perimeter and allow full curing before final cleaning.
8. Integrate smart controls
Link the system to a home automation platform for voice or app-based operation when desired.
Recommended Practices
Recommended actions
- Use only low-voltage certified wiring throughout the installation.
- Clean surfaces with non-abrasive materials and neutral solutions.
- Position controls away from moisture sources.
- Confirm warranty terms before any modification near the glass.
Actions to avoid
- Never apply ammonia-based cleaners that degrade conductive coatings.
- Keep sharp implements away from the glass surface.
- Do not connect panels directly to household current without proper conversion.
- Avoid placement near heat sources or open flames.
Situations Requiring Professional Assistance
Engage a licensed electrician when windows lack nearby power access or when multiple panels share a single control circuit. Professional wiring protects product warranties and ensures code compliance.
Condensation within panel layers requires specialist replacement rather than on-site repair.
Cost and Duration Overview
Pricing per square foot varies with panel construction and integration complexity. Custom shapes and automation features increase total expense. Basic film retrofits typically complete within several hours, while full panel replacements may require a full workday.
Routine Maintenance Steps
- Wipe surfaces monthly using a soft cloth and mild cleaner.
- Examine wiring connections annually for signs of wear.
- Reapply sealant where gaps appear along edges.
- Replace control batteries when switching speed decreases.
Daily Advantages of Switchable Privacy Glass
Installed units simplify light and privacy management throughout the day. Occupants gain immediate control over glare and views without cords or fabric maintenance. Interiors remain brighter and require less frequent cleaning compared with traditional window treatments.