Solar Smart Shades Generate Electricity While Managing Sunlight
You can cover windows and produce power simultaneously. Solar smart shades reduce energy costs by converting sunlight into electricity.
Window coverings typically block light without capturing the energy that reaches them.
This guide explains how solar smart shades operate, how to install them safely, and when professional assistance proves beneficial.
These shades generate power only with direct or strong indirect sunlight. North facing or heavily shaded windows yield lower output.
Key Considerations
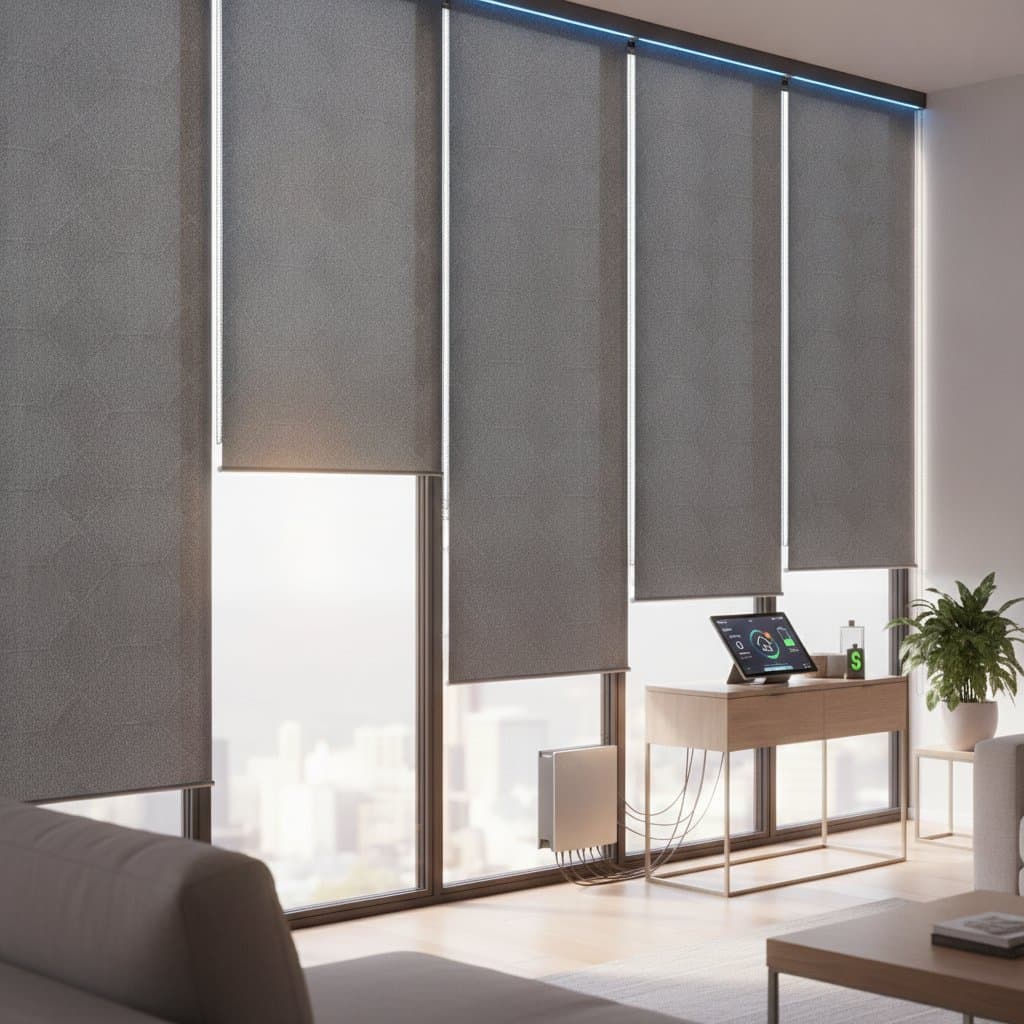
Solar smart shades integrate photovoltaic fabric with motorized mechanisms. Thin film solar cells within the fabric convert sunlight to electricity while allowing filtered light into the space. The generated energy charges a battery or connects to the household circuit. Optimal performance occurs on windows with steady sun exposure. Proper installation ensures indoor safety.
Required Tools and Materials
- Measuring tape
- Screwdriver or drill
- Level
- Mounting brackets and screws
- Solar shade kit featuring photovoltaic fabric
- Voltage tester or multimeter
- Ladder or step stool
A cordless drill speeds the process, yet a manual screwdriver suffices for careful work.
Installation Process
Measure Window Dimensions Accurately
Record the interior width and height of each window. Precise measurements ensure proper fit and maximum energy collection.
Select Mounting Style
Decide between inside and outside mounts. Inside mounts provide a clean appearance within the frame. Outside mounts offer greater light blockage and accommodate larger solar surfaces.
Assess Sunlight Availability
Target windows receiving at least four hours of daily sunlight. South and west orientations typically deliver the highest output. Tree cover or adjacent structures reduce production.
Secure the Mounting Brackets
Mark positions and verify level alignment before drilling. Fasten brackets securely to suitable surfaces. Secure attachment prevents tilting that diminishes solar exposure.
Position the Shade Unit
Insert the roller into the brackets with the photovoltaic side facing the glass. Incorrect orientation prevents energy capture.
Link the Electrical Components
Connect the output cable to the controller or battery. Maintain organized wiring away from moving elements.
Configure Automation Settings
Test operation via remote or application. Set travel limits to avoid contact with window surfaces.
Verify Energy Production
Measure voltage output if equipped with a tester. Readings between 5 and 12 volts confirm functionality.
Track System Performance
Review daily generation data through the companion application to optimize shade positioning.
Recommended Practices
Recommended Actions
- Wipe fabric surfaces with a microfiber cloth to preserve light transmission.
- Route cables to prevent interference with shade movement.
- Program schedules aligned with natural light patterns.
- Retain all product documentation for future reference.
Actions to Avoid
- Never clean shades using water, as moisture damages the photovoltaic layer.
- Refrain from applying strong chemicals or alcohol based products.
- Do not penetrate electrical components during installation.
- Skip placement on outward opening windows exposed to weather.
An energy systems engineer notes that incorrect window selection represents the most common error. Sun exposure determines success more than equipment scale.
Situations Requiring Professional Installation
Engage a qualified electrician for direct connections to home wiring or battery systems. Seek assistance with challenging frame materials such as aluminum or concrete to avoid structural issues.
Investment and Timeline
Per window costs range from 150 to 600 dollars based on specifications. A typical installation requires one to two hours. Larger or custom projects increase expenses. Primary factors include window dimensions, cell efficiency, and system integration level.
Ongoing Care
- Remove dust monthly using a soft cloth.
- Inspect wiring and brackets semiannually.
- Clean sensors as needed.
- Adjust limits when operation becomes inconsistent.
- Exchange batteries according to manufacturer guidelines.
Sudden changes in performance warrant checks for obstructions or connections.
Practical Implementation
Solar smart shades combine light management with renewable energy production. They suit bright interiors seeking both privacy and efficiency. Begin with high exposure areas to evaluate benefits before expanding the system. Consistent maintenance ensures reliable operation and sustained returns.