Why CO2 Sensors Matter in Modern Homes
Contemporary homes prioritize energy efficiency through airtight construction, which reduces heating and cooling costs. However, this design limits natural air exchange and can lead to elevated carbon dioxide levels indoors. CO2 sensors provide precise measurements to detect when ventilation becomes necessary, helping maintain a healthy environment before symptoms like fatigue or reduced concentration appear.
High CO2 concentrations often go unnoticed because they lack odor or visible signs. Levels above 1000 parts per million can impair cognitive function and overall comfort. This guide explains the role of CO2 sensors in protecting indoor air quality, details installation and usage procedures, and identifies situations that require professional intervention.
Note that homes equipped with fully automated mechanical ventilation systems may incorporate CO2 monitoring. Owners should verify the system's functionality through regular testing to ensure reliable performance.
Key Facts About CO2 Sensors
CO2 sensors quantify carbon dioxide levels in parts per million. Readings exceeding 1000 ppm indicate stuffy air that may induce drowsiness or headaches. In energy-efficient homes, restricted airflow makes manual or mechanical ventilation essential. These sensors alert users to activate windows, fans, or exhaust systems for fresh air intake.
Select devices certified for indoor use, such as those meeting standards from organizations like the EPA. Position sensors away from direct sunlight, drafts, or heat sources to avoid inaccurate readings.
Required Tools and Materials
- CO2 sensor or multi-function air quality monitor with digital display
- Mounting hardware, including screws or adhesive mounts
- Power source, such as batteries or an AC adapter
- Alcohol-based wipes for surface preparation
- Compatible smartphone or tablet for app integration, if applicable
Multi-parameter monitors that track CO2 alongside humidity and temperature serve as effective alternatives for comprehensive home monitoring.
Installation and Setup Guide
1. Select the Appropriate Sensor Type
Opt for nondispersive infrared (NDIR) technology, which delivers high accuracy for residential applications. Portable units suit temporary installations, such as in rental properties. Fixed wall-mounted models provide long-term reliability in owned homes.
2. Determine Optimal Placement
Install the sensor at approximately five feet from the floor in occupied areas like living rooms or bedrooms. Steer clear of kitchens, where cooking emissions might interfere with measurements.
3. Prepare the Mounting Surface
Wipe the chosen wall or shelf with an alcohol solution to remove residue. Allow the area to dry completely, ensuring no particles obstruct the sensor's intake vents.
4. Secure and Power the Device
Fasten the sensor using provided screws or adhesive. Connect the power source and activate the unit. Permit initial calibration, which typically requires several minutes; consult the manual for models that calibrate via outdoor air exposure.
5. Configure Notifications
For app-enabled devices, establish thresholds that notify users when levels surpass 1000 ppm. Standalone units often feature color-coded indicators: green for normal conditions, yellow for moderate elevation requiring ventilation, and red for urgent action.
6. Establish Baseline Measurements
Monitor readings over 24 hours to determine average levels. Ideal occupied spaces maintain 400 to 800 ppm. Persistent higher values point to insufficient air circulation.
7. Implement Ventilation Strategies
Respond to elevated readings by opening windows on opposing sides to promote cross-breezes. Activate heat recovery ventilators if installed, adjusting fan speeds as needed. Facilitate air movement by keeping interior doors ajar.
8. Evaluate Adjustments
Observe CO2 reductions following ventilation efforts, expecting drops within 15 to 30 minutes. This process refines understanding of seasonal ventilation requirements.
9. Schedule Routine Maintenance
Gently dust the sensor monthly and replace batteries according to manufacturer guidelines. Annual recalibration ensures ongoing precision; adhere to the specified maintenance timeline.
Best Practices and Common Pitfalls
Recommended Actions
- Position sensors in rooms occupied for extended periods, such as over one hour.
- Maintain a weekly log of readings to identify patterns or trends.
- Integrate CO2 monitoring with humidity assessments to mitigate mold risks.
- Operate sensors within standard room temperatures for consistent accuracy.
Actions to Avoid
- Do not install near heat vents, fireplaces, or open flames.
- Do not overlook sustained high readings, as they indicate ventilation deficiencies.
- Do not apply cleaning sprays or fragrances in proximity to the device.
- Do not rely on a single sensor for multi-story or expansive homes.
Professional Assistance Indicators
Engage a certified HVAC specialist if CO2 levels exceed 1000 ppm despite ventilation attempts. Such issues may stem from flawed ductwork, obstructed airways, or inadequate system capacity. Professionals conduct airflow diagnostics and system balancing to resolve underlying problems. In homes with advanced features like sealed flooring or integrated controls, expert setup preserves warranty coverage.
Investment and Effort Overview
Entry-level CO2 sensors range from $50 to $150, while app-integrated smart models cost $150 to $300. Basic installation requires about 20 minutes per device. Comprehensive systems linking to HVAC setups may exceed $800, influenced by factors like connectivity and advanced displays.
Ongoing Care Schedule
- Weekly Checks: Review displays for spikes over 1000 ppm and document observations.
- Monthly Tasks: Clean vents of dust and verify power integrity.
- Annual Procedures: Perform recalibration or battery replacements as recommended.
- Warning Signs: Address delayed responses, fading screens, or inconsistent data promptly to prevent monitoring failures.
The Importance of Monitoring CO2
Carbon dioxide at common indoor concentrations poses no direct toxicity, yet it serves as a key indicator of ventilation effectiveness. Dr. Lena Ortiz, an environmental engineer at Green Air Solutions, notes, "When carbon dioxide builds up, oxygen levels drop slightly and the body reacts with fatigue and slower focus." Tracking CO2 offers a direct method to assess fresh air delivery and overall indoor health.
Inadequate circulation also retains pollutants such as volatile organic compounds from household products. Elevated CO2 suggests these contaminants accumulate similarly. Regular ventilation based on sensor data expels a broad range of potential irritants simultaneously.
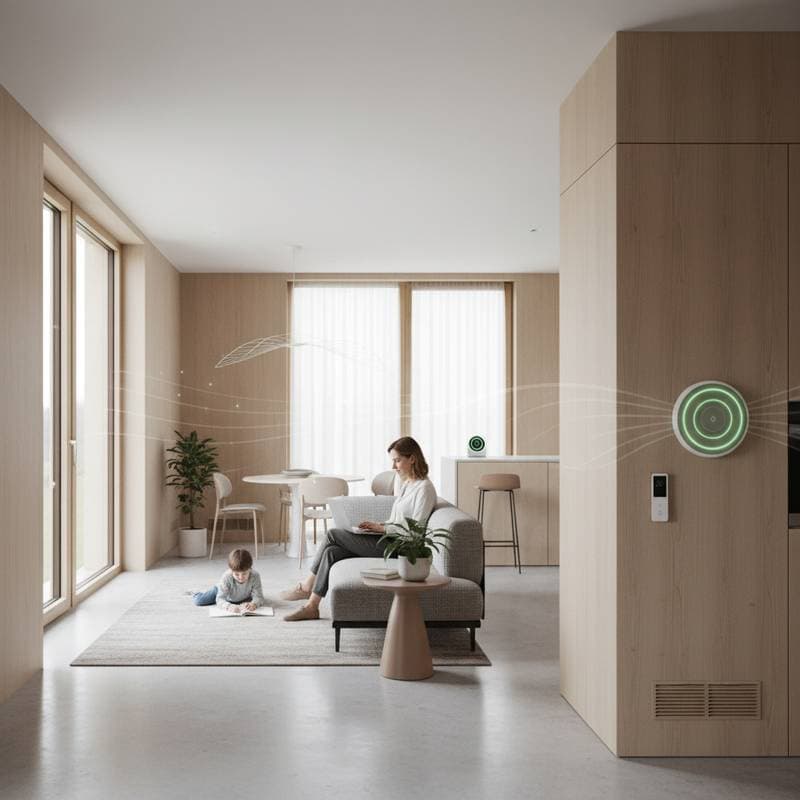
Integration with Smart Home Ecosystems
Contemporary smart thermostats and ventilation units often synchronize with CO2 sensors for automated responses to quality declines. Verify compatibility with existing hubs to streamline operations. This setup minimizes manual interventions, sustaining optimal conditions without frequent adjustments. Portable Bluetooth options provide renters with valuable insights absent permanent modifications.
Additional Safety and Positioning Advice
Connect sensors to outlets rated for indoor use only. Exclude high-humidity zones like bathrooms to prevent moisture damage. In basements, elevate units on walls, as heavier CO2 may settle low. For spacious residences, deploy sensors across primary zones; bedrooms gain from dual-function devices that also show temperature.
Expert Recommendations for Optimal Results
Document readings systematically, noting influences from activities like cooking or gatherings. Overnight spikes may necessitate slight window openings or programmed fans. In colder months, employ brief ventilation cycles to conserve energy while refreshing air.
Implementing Effective Monitoring
Begin by installing a single sensor in the primary living area to observe daily patterns. Expand coverage to additional rooms as insights develop. This approach delivers rapid improvements in comfort and health through informed air management.