Illuminate Dark Closets: A Guide to Smart LED Color-Changing Lights
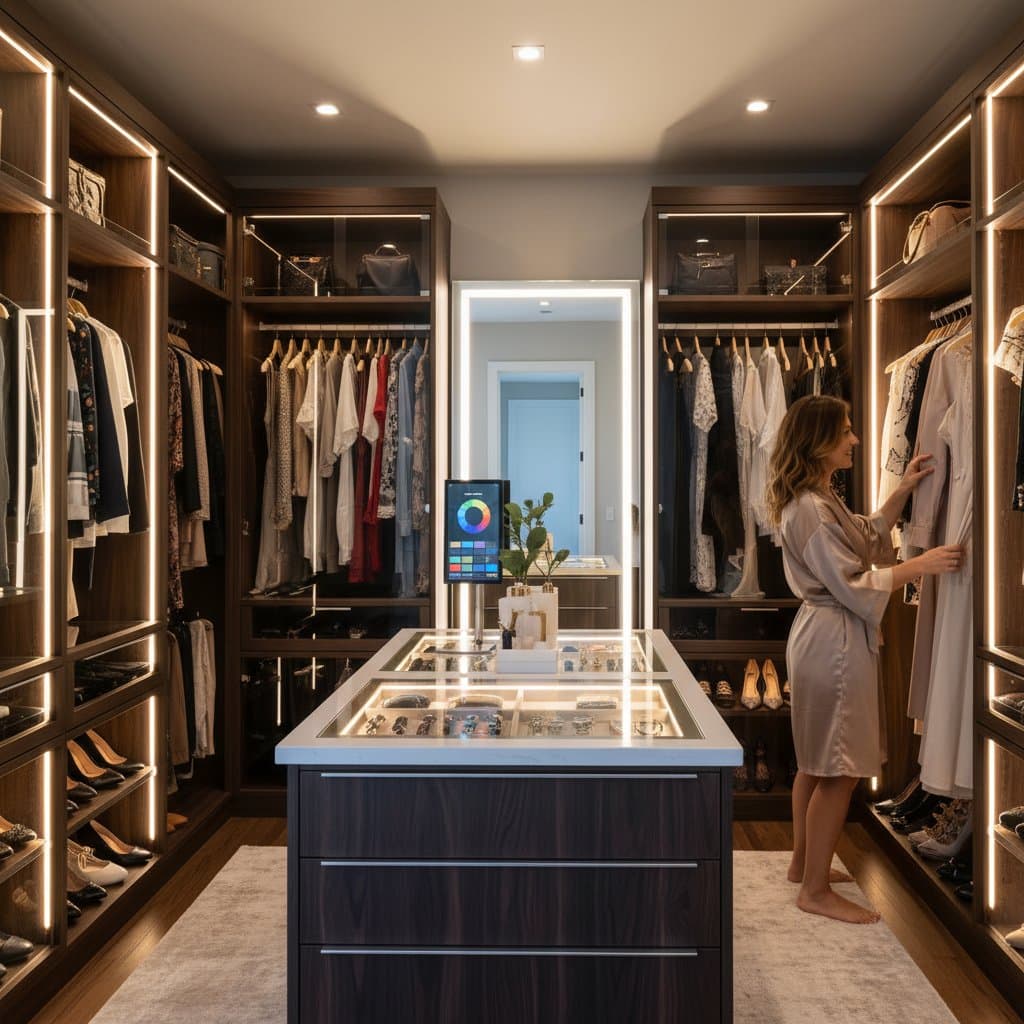
Enhance your daily routine by upgrading a poorly lit closet into a well-illuminated, organized retreat. LED color-changing lights provide adjustable illumination that reveals true colors, reduces frustration during outfit selection, and adds a touch of modern elegance.
Many closets suffer from inadequate lighting, which distorts colors and complicates finding items quickly. This guide outlines steps to install and optimize LED color-changing lights for a practical, visually appealing result.
Proceed with caution if your closet features exposed wiring or unsealed materials sensitive to heat or moisture. In such cases, consult a professional electrician.
Essential Tools and Materials
Gather these items to complete the installation efficiently:
- LED color-changing light strips or puck lights
- Compatible power supply or rechargeable battery pack
- Remote control or smartphone app (typically included in kits)
- Measuring tape
- Scissors (applicable only to cuttable LED strips)
- Rubbing alcohol and a clean cloth for surface preparation
- Mounting clips or adhesive pads
- Optional: Wire covers or cord concealers to achieve a seamless appearance
Consider rechargeable LED bars as an alternative when outlets are scarce. These options attach via magnets and recharge through USB ports.
Key Practices for Installation
Recommended Actions
- Select LED strips marked as cuttable if trimming is necessary for your layout.
- Test the entire lighting system prior to securing components permanently.
- Employ clips or channels to secure strips for a polished, professional outcome.
- Evaluate brightness settings to prevent excessive glare on reflective surfaces.
- Organize cords neatly to avoid interference with hangers or storage bins.
Actions to Avoid
- Position lights too close to fabric edges or insulation without adequate spacing.
- Connect multiple long strips to a single power adapter, which risks overload.
- Install unsealed LED strips in areas prone to dampness, such as laundry-adjacent closets.
- Combine connectors from mismatched brands, as compatibility issues may arise.
- Cover power supplies or control units with tape, since this traps heat and poses risks.
Project Overview: Costs and Timeline
Expect to spend between ten and fifty dollars on basic adhesive LED strips. Advanced systems with smart integration or aluminum channels may cost up to one hundred fifty dollars. Factors influencing price include intelligent features, total length, and lumen output.
Plan for one to three hours to complete most setups, accounting for surface cleaning and layout planning. Larger walk-in closets requiring zoned lighting or hidden wiring could extend the process to half a day.
Insights from Professionals
Lighting designer Carla Nguyen of Bright Habitat Design emphasizes the importance of accurate color rendering. She states, Good closet lighting should make colors honest. LEDs with adjustable tones let you see navy as navy, not black. Nguyen recommends indirect placement under shelves to minimize glare and extend strip longevity.
Electrician James Keller of SafeWire Services highlights connection quality as a common failure point. He advises, Always check polarity and use connectors rated for your strip voltage. Keller notes that proper setup prevents most electrical issues associated with LEDs.
Planning an Effective Lighting Layout
Approach closet lighting as an integral element of the space's design. Strategic placement not only brightens the area but also enhances usability and aesthetic appeal.
- Install vertical strips along both sides of hanging rods for uniform clothing illumination.
- Position under-shelf lighting to spotlight shoes, folded garments, or accessories.
- Incorporate accent lights behind mirrors or within glass-fronted drawers for vibrant highlights.
- Add overhead or top-mounted lights in a neutral tone to provide overall ambient coverage.
Layer sources for optimal results: Start with a foundational white light and layer accent colors as needed. For instance, apply soft pink hues to accessories or cool blue tones near silver jewelry to accentuate metallic sheens.
Ensuring Safety and System Compatibility
Verify that selected LED strips carry UL or ETL certification to guarantee electrical safety standards. Align the strip's voltage requirements with the power supply; common home setups operate at twelve or twenty-four volts for reduced risk.
Refrain from using alcohol-based cleaners on installed LED covers or diffusers, as they may cause clouding. Opt for a dry microfiber cloth for maintenance. If adhesive weakens, reinforce with double-sided tape suitable for plastic or metal surfaces.
In closets with mirrored doors or chrome fixtures, experiment with light angles to mitigate glare from reflections. Introduce a diffuser channel if needed to distribute light evenly and softly.
Curating Style and Atmosphere
LED color-changing lights introduce subtle sophistication without extensive renovations. Experiment with these schemes to match various preferences:
- Energizing morning routine: Warm white or golden yellow tones to invigorate and reveal earthy fabric shades accurately.
- Serene evening selection: Cool lavender or soft blue for a calming effect, ideal for relaxed unwinding.
- Bold personalization: Vibrant reds or greens to accentuate statement pieces like colorful scarves or jewelry.
- Neutral professionalism: Crisp daylight white for precise matching of work attire.
Integrate app-based scheduling to automate color shifts, such as brighter settings during peak usage hours.
Execute Your Closet Upgrade
Begin by measuring your space and sketching a layout to visualize light placement. Clean surfaces thoroughly, then test and install components following the outlined practices. Customize colors via the app or remote to suit your needs, and maintain the system regularly for lasting performance.
This upgrade transforms routine tasks into seamless experiences, fostering a sense of order and style in your daily life.